Welcome to Hyper! We're an avatar social network that makes it easy for VTubers (Virtual YouTubers) to make videos and live-stream using avatars. Hyper uses motion capture to bring your vtuber to life with realistic facial animations and a suite of tools for beginners and professionals. Record and post on our app, or export your avatar through OBS (Open Broadcasting Software) if you have a preferred desktop setup.
Phone Vtuber Application to OBS Tutorial
Introduction to Vtubing
You might want to use your Hyper streaming setup with desktop apps like Zoom, Discord, Twitch, or YouTube. This guide will teach you how to use Hyper with streaming tools like Streamlabs or OBS.
Streamlabs or OBS are software used by streamers to send video output to livestreaming services like Twitch and YouTube. They also have tools that will allow you to use them with external apps, enabling you to use your avatar in Zoom or Discord calls with your friends.
While this guide has been written specifically for OBS, the general rules are the same for most streaming software. We will also focus on using OBS with Zoom, because setting up OBS for a stream is a complex process for which many guides already exist, such as this detailed guide by The Verge.
Our guide requires the use of additional equipment if you need to connect Hyper with OBS on a Windows operating system. If you’re looking for an equipment-free guide, check out Vtubing with Hyper’s OBS Plugin for Windows.

Requirements
There are different requirements for setting up Hyper with OBS depending on the operating system of your computer.
macOS
If you're using Apple’s macOS, your computer will automatically see any attached iPhone as a video input, so you will not need any extra accessories other than a Lightning cable to attach your iPhone to your macOS device. This will enable you to stream using OBS with no other equipment necessary.
Windows
These steps outline one way to configure the capture card with your Windows device but other configurations also exist, so feel free to experiment to see what works best for you.
- Plug the USB-C cable into the side of the capture card marked In.
- Place the other side of the USB-A cable into your computer.
- Insert the HDMI cable into the side of the capture card marked In.
- Put the other side of the HDMI cable into the HDMI to Lightning Dongle.
- Insert the HDMI to Lightning Dongle into your iPhone.
- Optionally plug another lightning cable into the HDMI to Lightning Dongle to charge your iPhone while using the app.
Additional ways to setup for windows:
Simple Setup:
Capture Card Setup:
- Capture Card: Elgato HD60S+ on Amazon
- HDMI to Lightning Dongle: Apple Lightning Digital AV Adapter
Wireless Setup:
Set Hyper Online to OBS mode
Before you start, make sure you've created your avatar by tapping the Avatar button on the Home screen. We also have limited support for VRM files, if you want to bring your own.
Check out our quick and easy guide on 📫How to Import VRM files on Hyper for more information.
Hyper has an OBS mode built in that you can access from the create button in the bottom-center. We built this mode for VTubers and people who want to use their avatars with their computers. This hides all of the Hyper user interface and allows you to optionally add a chroma key (green or blue screen) so that you can use your avatar to stream with OBS or other streaming software or even record videos for apps like TikTok and YouTube with a custom background.
Getting to OBS Mode
- Open Hyper on your iOS device.
- Tap the OBS button in the menu that opens up from the bottom-center button.
Configuring OBS Mode
- From this sheet, you can configure a Chroma Key color for green-screening (or blue-screening) your character's feed.
- If your video is going to be landscape instead of portrait (like most Zoom calls or live-streams) — we also recommend rotating your device to landscape mode (sideways) using the button in the OBS Mode sheet.
- Once you've configured your background and rotation, hit Start OBS Mode to hide all of the UI so you can use it with your computer.
- You should now have a clean, Chroma-Key ready output to use with your computer.
- When you're done, shake your phone to bring the controls back.
OBS configuration
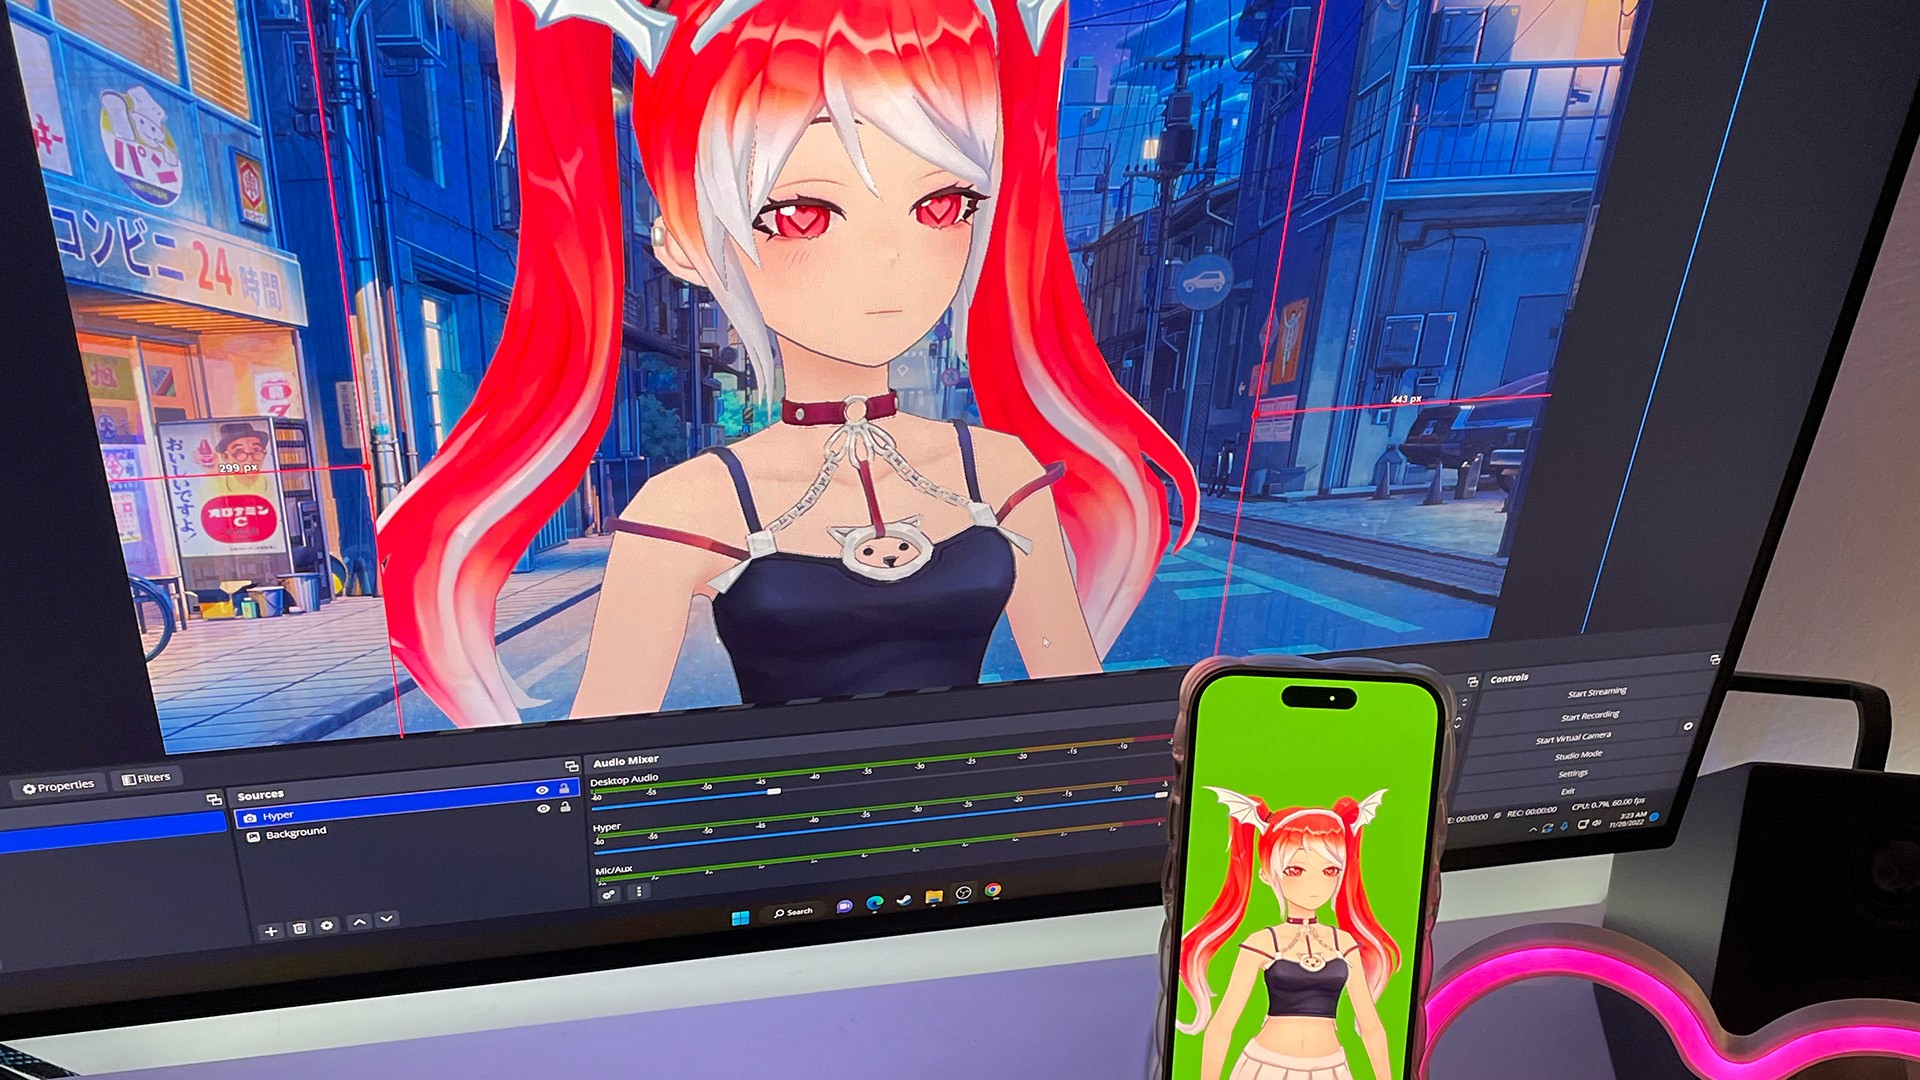
Add your iPhone as a Video Capture Device Source
The first step in setting up your livestream is to make your device recognize your iPhone as a video capture device source:
- Click the + in the Sources panel to add a new source.
- A window should pop up, click Video Capture Device.
- Make sure Create new is selected, and rename the file to whatever you like.
- Select your iPhone as the Video Capture Device you want to add:
On macOS devices, your iPhone will show up as a Video Capture Device named the same as your phone (for example the iPhone 2.0).
- On Windows devices, you want to select your Capture Card instead of the phone, which in this guide is the HD60S+ Capture Card.
- You should see a preview. If your computer can handle it, turn the resolution up to the highest to make sure your resolution looks good. We recommend using 1920 x 1080 for high quality resolution.
- Click OK — it should add the Video Capture Device as a source and get added to the scene. You may need to resize the source afterwards to fit the canvas.
Select your iPhone as the Video Capture Device you want to add:
- On macOS devices, your iPhone will show up as a Video Capture Device named the same as your phone (for example the iPhone 2.0).
- On Windows devices, you want to select your Capture Card instead of the phone, which in this guide is the HD60S+ Capture Card.
- You should see a preview. If your computer can handle it, turn the resolution up to the highest to make sure your resolution looks good. We recommend using 1920 x 1080 for high quality resolution.
Click OK — it should add the Video Capture Device as a source and get added to the scene. You may need to resize the source afterwards to fit the canvas.
Filtering out the Green Screen
If you've got a green screen or a blue screen applied through the Hyper for OBS mode, you can remove it with these steps to be able to isolate your avatar and add a custom background:
- Right click the Video Capture Source in the Sources panel.
- Click on Filters, then click the + under Effect Filters.
- Select Chroma Key from the list. This is the technical name for a green screen.
- Select the key color (typically blue or green) and configure the Similarity until it looks right.
- Click OK to save your selection.
Configuring your background.
Most streaming software allows you to compose multiple visual inputs in the same frame. This allows you to add visual components such as GIFs, videos, images, or websites to use as a background or a prop in your streaming setup. From here, you can go wild and do whatever you like, but the simplest way to get started is by adding an image:
- Go back to the Sources panel and click the + to add an Image. Make sure Create new is selected.
- Select an image from your computer.
- Click OK.
- Your image should have been added to the scene. If it's covering your avatar, you can drag the source to re-order the inputs by placing the image source below your video capture source.
Configuring your avatar's crop.
If you chose one of the default resolutions, you'll probably have some black edges on the sides of your stream since iPhone's screen resolution doesn't match the standard video resolutions exactly. You can either:
- Change the resolution of the video input to match the default resolution (🙄); or
- Crop the black edges out of the frame — to do this, click the source in the preview and drag a resizing handle (the little square on the sides) while holding ⌥ (Option on a Mac) or Alt on Windows
From here you can resize both the background and your avatar's layer as necessary.
And now you can continue to add videos, websites, or whatever else you want from the Sources panel. Go wild.
Configuring to work with Zoom, Discord, etc.
Finally, configure Zoom to use your OBS Virtual Camera:
- When you’re ready to use your setup with external apps, click Start Virtual Camera under the Controls panel in OBS. The Virtual Camera should be installed by default if you’re on the latest version of OBS. If not, we recommend downloading the updated version on your device.
- You should now see the OBS Virtual Webcam as a video output in any of the video sharing apps you have. In Zoom, you can find this in Settings → Video. You can also access the video output options in a video call from the options of the disclosure triangle (or the little upwards-pointing arrow at the edge of the square) on the Start Video / Stop Video button.
- For best results, start Zoom (or another video-sharing app such as Discord) only after you've clicked the Start Virtual Webcam button in OBS.
- When you’re done streaming with your avatar on OBS, simple shake your phone to exit the OBS mode on the Hyper app.
And That’s It!
This is how you can use Hyper with the streaming software on your computer!
We're looking into ways to improve this experience ourselves, so if you're interested in building tools to make this easier, please reach out to us at:
- feedback [at] hyper.online if you've got ideas for things we should add or consider
Additional Guides
You can easily configure Hyper to work with any third party streaming software like OBS or Streamlabs. To learn more, check out our guides:
- All about Hyper Online
- Import VRMs and use a custom character
- Setting up Collab Streams
- Use Hyper with Discord Webhooks
- Mirror your VTuber from iPhone to your PC
- Livestreaming with avatars using OBS
- VRM Optimization Guide
- Vtubing with Hyper's OBS plugin